Above ground poolliner
Materials Needed
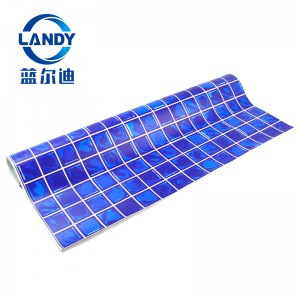
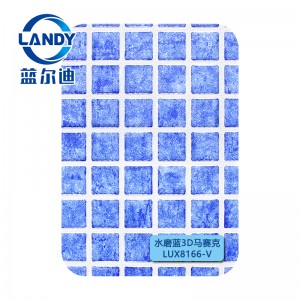
• Pool Liner.
• Overlap Liner Clips or Plastic Coping (for Overlap Pools only).
• Shovel to remove grass and spread sand.
• Mason Sand for 2" layer depth.
• Rake.
• Duct Tape.
• Socks to wear for step 8.
• “Do Not Dive” sticker.
• Optional - Soft Bristle Broom.
• Optional - Bottom Pool Cove. Peel-and Stick or Snap-in-Place.
• Optional - Vinyl Liner Wall Foam.
• Optional - Bottom Pool Pad.
• Optional - Shop Vac to remove air from behind the liner.
• Optional - For overlap pool to standard beaded style pool conversion, Liner.
• Conversion Strips.
• Optional - Liner Conversion Strips for overlap pool to standard beaded style pool conversion.
Procedure:
1. In order to prevent wind damage to your pool, do not drain it until you receive your new liner, inspect the liner package to ensure damage has not occurred in transit, and confirm sizing to make sure it is the correct item.
2. Remove any grass and roots within the pool area and one foot beyond. Grass and weeds can and will grow through the liner material and any damage is not covered by the warranty. Help prevent this by using Liner Guard for round pools or for oval pools.
3. After the surface has been leveled, spread a 2" layer of mason sand over the entire bottom area of the pool within the confines of the wall. This protects the liner from the metal edges of the pool. Rake out smoothly and hand tamp to pack the sand. Do not use beach or play sand as it will not compact and will leave footprints. Use virgin material that does not contain seeds or spores. (Note, some manufacturer's instructions may vary based on the pool - always follow the manufacturer's recommendations.)
4. Refer to "Figure A" below. Form a 6"x6" cove by compacting the mason sand around the inside perimeter of the pool area. A preformed styrofoam pool cove (Peel-and Stick or Snap-in-Place) can also be used in place of the sand cove. Cover the screws on the wall joint with duct tape to protect the liner from being punctured.
5. Place the liner carton in the center of the pool.
6.Carefully open the carton. Do not use a knife or any sharp instrument that will cut through the carton and potentially damage the liner.
7. Unfold the liner and spread it in the sun to warm up. The ideal temperature should be above 70 degrees Fahrenheit. If installing a J-hook or overlap liner, your top ledges will have to be removed to install the liner. You do not need to remove the top ledges for beaded liner installation.
8. Arrange the liner so it is centered in the pool. The welded seams of the wall and floor must fall on the center of the cove. The floor seams should run straight and parallel to the side of the pool. On rectangular or octagon pools, ensure that the corners line up correctly. Note: wear socks during this step preferably. Note: it is preferable to wear socks during this step.
9. Inspect all seams to ensure that they are not open and check the surfaces for any holes.
10. On overlap liners, lift the sides of the liner and drape them over the pool wall. Fasten the liner to the wall with plastic coping or Overlap Liner Clips.
11. Leave the liner loose fitting on the wall. Do not pull tight at this time. The floor to wall seams must be on the cove. It may be necessary to fill a water bag and place it on one end of the pool, pulling on the opposite end to stretch the floor across the bottom of the pool area - being folded up in the carton, it might fall short. When the pool begins to fill, the water bags become weightless and can be easily removed.
12. Start filling the pool with water. With about 1/2 inch or so of water, smooth out the wrinkles on the floor of the liner. Start at the center and work out toward the edges. A soft bristle broom with be helpful.
13. For overlap liners, as the pool is filling, remove the coping one at a time around the top edge, and adjust the wall length by adding or removing material as necessary. Trapped air can form as water level is rising. This is normal.
14. Do not cut out any openings in the wall for in-wall skimmers, returns, lighting fixtures, etc. until the water is 3" below each of those respective openings.
15. Continue to fill pool until desired level is reached.
16. Attach a "Do Not Dive" sticker to your liner two inches above the water level. It must be clearly visible.
17. Prep your filtration system and let it run. Once the filtration system moves the water smoothly, you can add sanitizers and clarifiers as necessary. If you need assistance with any of these steps, visit us online at website.com, email us at customercare@website.com, or give us a call at 1-800-574-7665.
HOW TO INSTALL AN ABOVE GROUND POOL LINER
A new pool liner is a great way to refresh the look of your above ground pool without spending a lot of money, especially if you DIY it. In fact, installing your own above ground pool liner can save you $1000 or more! Whether you have just purchased a brand new complete pool package from website or are replacing the liner on your existing above ground pool, our handy guide will make the installation process super simple. You can complete this project in about a day with a little preparation, the right materials, and our step-by-step guide.
Notes:
You did it! Your pool liner is installed, the water is full to your above ground pool’s capacity, and the weather is just right for a swim. Invite your family, friends, and neighbors over and show off your handiwork!
• Slight wrinkles may appear and are not unnatural, nor do they affect the warranty.
• A vacuum system (shop vac) can help remove the air from behind the liner. Insert a vacuum cleaner hose through the skimmer hole. While vacuuming, you should adjust the liner with short tugs to eliminate the wrinkles.
• The liner is not a structural part of the pool. Its purpose and design is to form a water seal. Water pressure is held by the pool wall and frame and not by the liner. A properly installed liner must be supported by the ground, cover and pool wall. An improperly installed liner will not support the weight of the water, resulting in a blowout, which is not covered by the warranty.
• Overstretching will void the warranty. Any excess stretching will shorten the useful life of the liner.
• Your pool manufacturer's installation instructions will be a very important source of additional information.